| The 86-92 RX7’s have “rear steer”. For those of you not familiar with this, it is a combination of rear suspension geometry, and compliant bushings that “make” the rear of the car steer into the turn. This is accomplished by making the rear of the car steer to the outside of the corner, which then makes the front point into the turn more than it normally would.“Most” drivers either never push the car hard enough to “activate” the “system”, or simply do not notice the somewhat unnatural handling at that point. The easiest explanation of what it feels like is that just at the point you would expect the rear to start coming out a little (right about where you would leave your foot in it, and apply a little reverse-lock), instead the rear kind of steers out a little, and the front steers into the corner. Noticeably beyond that point, the car behaves about normal. The real “problem”, is the passing across (and back) of that “point/time period” when the rear steer is “in control”.
Those OEM bushings, as far as we know, are still not available by themselves, and require purchasing the entire rear carrier assembly. The Rear Steer Eliminator Bushing Set we offer replaces the OEM compliant bushings with a delrin / steel sleeve combination. This eliminates the rear steer, if that is what you want, and / or saves a ton of $$ if your OEM bushings are worn out. The instructions that are supplied with the bushing kit are somewhat hard to understand (and the latest instructions (4/2/00) that we had were WRONG!), so we hope this pictorial FAQ will help with the installation. |
|
 This is what the new bushing set (#14050) looks like. One set does both rear wheels. |
|
 The bushing is the one below, to the inside a little, and at an angle, to the rear caliper. The bushing is the one below, to the inside a little, and at an angle, to the rear caliper. |
|
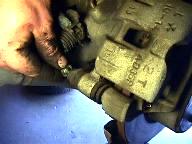 Put car up, take off rear wheel(s), and remove the caliper bolt shown. Put car up, take off rear wheel(s), and remove the caliper bolt shown. |
|
 Rotate the caliper up on the upper pivot/slide. Rotate the caliper up on the upper pivot/slide. |
|
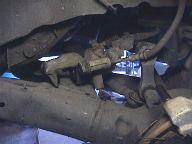 We find it easiest to then slide the caliper off the pivot, and lay the assembly on top of the rear swing arm, with the hand brake cable still attached. We find it easiest to then slide the caliper off the pivot, and lay the assembly on top of the rear swing arm, with the hand brake cable still attached. |
|
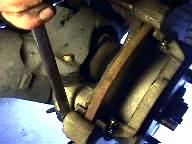 Remove the brake pads, then the rear caliper mounting bracket. Remove the brake pads, then the rear caliper mounting bracket. |
|
 It is FAR easier to then cut the dust shield and “spiral” it off, that way the hub does not have to be removed from the carrier. It is FAR easier to then cut the dust shield and “spiral” it off, that way the hub does not have to be removed from the carrier. |
|
 Remove the axle nut with whatever tools you have available. (32mm socket) Remove the axle nut with whatever tools you have available. (32mm socket) |
|
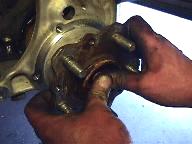 The axle has plenty of room to push in an inch or so. On most cars here in California, we can just push it in by hand. (see next frame) The axle has plenty of room to push in an inch or so. On most cars here in California, we can just push it in by hand. (see next frame) |
|
 The car we were doing for this FAQ did not cooperate with us !! The next thing to try is carefully hitting the axle end with a copper or lead faced hammer to loosen it. (see next frame) The car we were doing for this FAQ did not cooperate with us !! The next thing to try is carefully hitting the axle end with a copper or lead faced hammer to loosen it. (see next frame) |
|
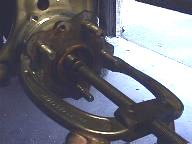 We ended up having to put a puller on it to push the axle in. Remember, this set-up is to PUSH the axle in/loose, NOT to remove the hub. We ended up having to put a puller on it to push the axle in. Remember, this set-up is to PUSH the axle in/loose, NOT to remove the hub. |
|
 Next remove the three bolts holding the hub carrier to the control arm. We are trying to show the 3 here. Next remove the three bolts holding the hub carrier to the control arm. We are trying to show the 3 here.1) Up from bottom, in front – shown here with a deep flex socket on it 2) Up from bottom where his left hand is pointing with a screwdiver 3) In from rear, on the top, where his right hand is holding the impact gun |
|
 Sometimes the sliding sleeve on the upper needs to be pushed out some to free up the carrier. Sometimes the sliding sleeve on the upper needs to be pushed out some to free up the carrier. |
|
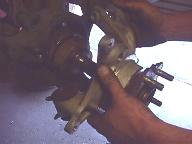 Now take the carrier off the car, leaving the axle in the car. Now take the carrier off the car, leaving the axle in the car. |
|
 Now is a good time to wire brush the axle spline, and the spline inside the hub it goes into. Then put a good coating of wheel bearing grease, or anti-seize on the splines. Now is a good time to wire brush the axle spline, and the spline inside the hub it goes into. Then put a good coating of wheel bearing grease, or anti-seize on the splines. |
|
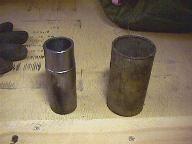 These are just the things we made to make the job easier. Pieces of tubing or various sized sockets will also work. What you need is ones that will go under the carrier metal (see below) and let the bushing go into the socket, and ones to push from the top. These should also work for the re-assembly. These are just the things we made to make the job easier. Pieces of tubing or various sized sockets will also work. What you need is ones that will go under the carrier metal (see below) and let the bushing go into the socket, and ones to push from the top. These should also work for the re-assembly. |
|
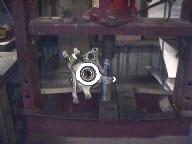 By far easiest to use a press, but a combo of long bolts, big washers, those sockets, and nuts can be created to remove the old bushings, and put the new ones in. By far easiest to use a press, but a combo of long bolts, big washers, those sockets, and nuts can be created to remove the old bushings, and put the new ones in.Or maybe this is a good place to print these pictures out, and take the parts to a local place with a press, and let them press the bushings out and in ??? |
|
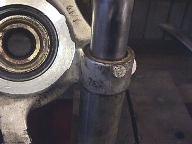 Here we are pressing the old bushing out. Here we are pressing the old bushing out. |
|
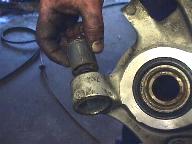 This is what you are removing. This is what you are removing. |
|
 Pressing the delrin bushing in — This is pressed in FROM THE TOP, as the carrier would be sitting in the car!! — that way the flanged part of the bushing is on the top. Pressing the delrin bushing in — This is pressed in FROM THE TOP, as the carrier would be sitting in the car!! — that way the flanged part of the bushing is on the top. |
|
 Another shot of the press setup. Another shot of the press setup. |
|
 Now press in the inner steel sleeve, into the delrin bushing. BE SURE to have the notched end of the sleeve pointing UP, as the carrier would be mounted in the car. (see next frame) Now press in the inner steel sleeve, into the delrin bushing. BE SURE to have the notched end of the sleeve pointing UP, as the carrier would be mounted in the car. (see next frame) |
|
 This is a detail shot to show why the steel sleeve has to point UP. The smaller diameter of the notched end must sit in the flat area between the rather shallow shoulders near the bolt hole in the control arm. This is a detail shot to show why the steel sleeve has to point UP. The smaller diameter of the notched end must sit in the flat area between the rather shallow shoulders near the bolt hole in the control arm. |
|
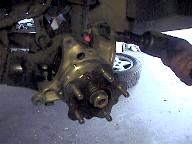 I know everyone hates to read this step, but it really is just “assembly is the reverse of the steps you already did”.Be sure to tighten all the bolts, and this is a good time to replace the rear pads if needed. I know everyone hates to read this step, but it really is just “assembly is the reverse of the steps you already did”.Be sure to tighten all the bolts, and this is a good time to replace the rear pads if needed. |
|
Product Search:
